
Uncategorized
How to Stop Blisters on Feet Hiking
Mar
The first hot spot usually shows up long before the proper blister does. You feel that slight rub on your heel or under the ball of your foot, tell yourself it is probably nothing, and keep walking. A mile later, your pace changes. A few miles after that, the walk you planned turns into a damage-limitation exercise. If you are wondering how to stop blisters on feet hiking, the good news is that prevention is far more reliable than treatment.
Blisters are not just bad luck. Most of them come from a very predictable mix of friction, moisture, heat and pressure. Change those factors early enough, and you can stay comfortable for longer, move with more confidence and finish the day thinking about the view rather than your feet.
Why blisters happen on hikes
A blister forms when the upper layers of skin are repeatedly rubbed against the layers beneath. On a hike, that rubbing usually comes from your foot moving inside the sock, the sock moving inside the boot, or certain areas carrying more pressure than they can handle over distance.
Moisture makes it worse. Sweat softens the skin, which means friction does more damage more quickly. Heat builds as you climb, descend or simply keep moving for hours. Add grit, damp socks or poorly fitting footwear, and you have the perfect set-up for a blister.
This matters because hiking blisters rarely come from one dramatic mistake. They usually come from a series of small issues that stack up – slightly loose heels, seams in the wrong place, toenails a bit too long, feet getting sweaty, and no action taken when the rubbing starts.
How to stop blisters on feet hiking before they start
The biggest win comes from treating blister prevention as part of your kit, not an afterthought. Most hikers focus on boots first, but the full system matters: footwear, socks, friction control and in-walk habits all work together.
Get the fit right, not just the size
Boots or trail shoes that are too tight create pressure points. Too loose, and your feet slide with every step. Neither is good. Your heel should feel secure without lifting excessively, and your toes should have enough room that they do not jam into the front on descents.
Fit also changes over the day. Feet swell on longer walks, especially in warm conditions. That is why trying on hiking footwear later in the day often gives a more realistic fit. If you are between sizes, the better option depends on the shape of the shoe and the thickness of the socks you actually hike in.
Lacing matters more than many people realise. A small adjustment can reduce heel slip or ease pressure over the top of the foot. If one area consistently rubs, it is worth experimenting rather than assuming the whole boot is wrong.
Choose socks that manage moisture and movement
Cotton socks are rarely your friend on a hike. Once they get damp, they stay damp, and damp skin is far more likely to blister. A technical hiking sock made from merino blend or synthetic fibres will usually do a much better job of moving moisture away from the skin.
Thickness is not a simple yes or no. Thicker socks can add cushioning, but they can also make a close-fitting boot too tight. Thinner socks can reduce bulk, but if the shoe fit becomes sloppy, friction may increase. The best sock is the one that works with your footwear and the kind of hike you do most often.
If your feet sweat heavily, carrying a spare pair can make a real difference. Changing into dry socks halfway through a long walk is not glamorous, but it can save the second half of your day.
Reduce friction before it becomes a problem
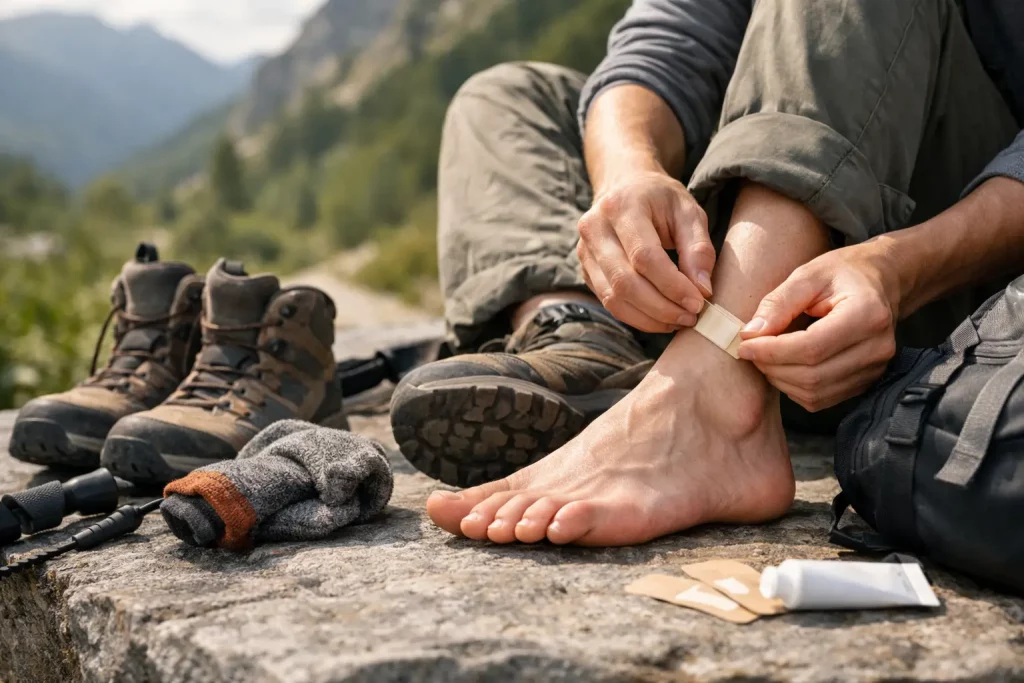
If you know your usual trouble spots, protect them before you set off. Heels, toes, the ball of the foot and the arch edge are common areas. This is where a purpose-made anti-blister balm can earn its place in your pocket. Applied before the hike, it helps reduce the skin-on-sock friction that leads to hot spots and blisters.
The practical advantage is simplicity. A small stick is quick to use, easy to reapply and does not turn into a messy routine at the trailhead. For hikers who want comfort without fuss, that matters. RG products are built around exactly that idea – helping you stay active longer by reducing friction before discomfort has a chance to interrupt the day.
Break in footwear the smart way
New boots do not become trail-ready just because they feel fine in the house. Materials soften, but your feet also need time to show you where the pressure points are. Start with short walks, then local routes, then longer outings with the same socks and pack weight you plan to use properly.
This is especially important with stiffer walking boots. Softer trail shoes may feel ready sooner, but even then, a few test outings are worth it. A boot that feels perfect for forty minutes can behave very differently after four hours and a long descent.
If a specific spot keeps rubbing during break-in, take that seriously. Sometimes a small lacing change fixes it. Sometimes you need a different insole. Sometimes the shoe shape simply does not suit your foot. Better to learn that close to home than halfway up a ridge.
Keep feet dry on the move
Dryer feet generally cope better with long miles. That does not mean your feet must stay perfectly dry all day, which is unrealistic on warm, wet or steep hikes. It means managing moisture before it builds into a problem.
Start with breathable footwear suited to the conditions. Waterproof boots are useful in wet ground and bad weather, but on hot days they can trap more heat and sweat. There is always a trade-off. If you mainly hike in dry conditions, a more breathable shoe may help your feet stay cooler.
When you stop for a break, loosen your laces and let heat escape. If your socks are soaked through, change them. If you have walked through streams or heavy rain, do not just hope things sort themselves out. A short reset can prevent a long, painful finish.
Act on hot spots immediately
One of the best answers to how to stop blisters on feet hiking is also the simplest: do not ignore the warning signs. A hot spot is your early alert. It is the moment when a small intervention still works.
As soon as you feel rubbing, stop. Check the area. Remove grit, adjust your sock, relace your boot, and apply blister protection or friction-reducing balm if you have it with you. Waiting another twenty minutes often turns a manageable issue into broken skin.
This is where experienced hikers often differ from beginners. They are not tougher because they push through pain. They are smarter because they know when to stop early and protect the miles ahead.
Small details that make a big difference
Toenails should be trimmed so they do not press against the front of the shoe on descents. Insoles should sit flat and not shift. Socks should be smooth, with no folds around the heel or forefoot. Even a tiny crease can become a problem over distance.
Route profile matters too. Long descents increase toe pressure. Steep climbs can create extra rubbing around the heel if your foot is lifting. A loaded rucksack changes your gait and can increase force through the feet. If you are training for longer hikes, do some walks with the pack weight you will actually carry.
And be honest about your own blister patterns. Some people always get them on the heel. Others get them between the toes or under the forefoot. The more specific you are, the easier it is to prevent the next one.
What to do if you are prone to blisters
If blisters happen on nearly every hike, your system needs adjusting rather than minor tweaking. Start by reviewing footwear fit, then look at your sock choice, then your moisture and friction management. Many hikers change one thing and hope for the best, but it is often the combination that solves it.
It may also help to build a repeatable pre-hike routine. Trim nails the night before, wear the same proven socks, apply anti-blister protection to your known hot spots, and pack one small foot-care item for reapplication or backup. That kind of consistency removes guesswork.
Comfort is performance on the trail. When your feet are sorted, your posture stays better, your pace stays steadier and the day feels more open. You can focus on the climb, the weather coming in, the quiet stretch through the trees – all the reasons you went walking in the first place.
The best blister strategy is not heroic. It is practical, early and repeatable. Look after the friction before it turns into pain, and your feet will carry you much further with far less fuss.