Uncategorized
Foot Blister Treatment: The Athlete’s Guide to Fast Healing and Active Recovery
Mar
Up to 39% of marathon runners develop foot blisters during a single race. That’s a staggering number, but for you, it’s just one that matters: the one searing with pain, threatening to derail your entire training schedule. We get it. That burning bubble of fluid feels like a massive setback. It’s a frustrating, painful barrier standing between you and your next goal, forcing you to choose between pushing through the pain or losing precious momentum.
But what if you didn’t have to choose? This guide is your new game plan. Here, you’ll discover the secrets to effective foot blister treatment that not only provides immediate relief but allows you to continue training safely and confidently. We’re breaking down everything from clinical first aid you can perform at home to advanced friction management strategies that act as invisible armor, turning you into an unstoppable force.
Key Takeaways
- Discover the athlete’s protocol for safely draining painful blisters to get immediate relief without risking infection.
- Learn which advanced dressings, like hydrocolloid and Moleskin, will best protect your wound and accelerate healing.
- Implement an active recovery strategy, a complete foot blister treatment that allows you to keep training without pain.
- Shift from reactive care to proactive prevention and build your invisible armor against friction for good.
Understanding Foot Blisters: Why Your Feet Rebel During Training
That familiar, fiery sting. It’s the feeling that can turn a record-setting run into a painful limp. Foot blisters aren’t just a minor irritation; they are your body’s direct response to a battle being waged inside your shoe. They are the enemy of endurance, but understanding your enemy is the first step to conquering it.
A foot blister is a fluid-filled pocket that forms between the upper layers of skin. It’s your body’s self-defense mechanism against relentless friction. This friction is almost always caused by a combination of three key factors, a performance-killing cocktail we call the “Friction Trio”:
- Heat: As you train, your feet get hot and can swell up to a full shoe size. This increases pressure inside your shoe, creating new points of contact and friction.
- Moisture: Sweat softens your skin, making it more pliable and far more susceptible to tearing under stress. Damp socks are a blister’s best friend.
- Repetitive Movement: The thousands of steps taken during a 10k run or a long hike provide the consistent, shearing force needed to separate skin layers.
This trio loves to attack specific “Hot Zones” where pressure and movement are highest. For most athletes, these are the back of the heel, the sides and tops of the toes, and the ball of the foot. Knowing your personal hot zones is crucial for proactive defense.
The Anatomy of a Friction Blister
When subjected to intense shear stress, the top layer of your skin (the epidermis) is literally pulled apart from the layer beneath it (the dermis). Your body, in its attempt to protect the vulnerable new skin, rushes to fill that gap with a clear liquid called serum. This process, which you can read more about in this guide on What is a blister?, is your body’s defense mechanism. Friction blisters are the body’s inflammatory response to mechanical shear force, creating a fluid-filled cushion to protect underlying tissue. While most are filled with clear serum, a dark red or purple blister indicates a blood blister, where the friction has also damaged small capillaries. This signals deeper damage and requires more careful monitoring.
The “Hot Spot” Warning Phase
Your body gives you a warning before a full-blown blister forms. It’s called a “hot spot”—that initial sensation of localized stinging, warmth, or redness. Ignoring this is the single biggest mistake an athlete can make. A core principle of effective foot blister treatment is prevention, and acting on this warning is your first and best line of defense. Remember this rule: stopping for 60 seconds to address a hot spot can save you 6 days of painful recovery.
If you feel a hot spot mid-race or hike, take immediate action with these field-expedient fixes:
- Stop. Don’t try to “run through it.”
- Dry the area. Moisture accelerates blister formation.
- Apply a barrier. Use an anti-chafe balm or specialized athletic tape to create a slick, protective surface.
- Adjust your gear. Smooth out your sock or try a different lacing technique to relieve pressure.
The Athlete’s Guide to Safe Foot Blister Treatment
You’re in the middle of a training block, and a painful, fluid-filled blister appears. The classic advice is simple: leave it alone. But for an athlete, that’s not always an option. A high-pressure blister on a weight-bearing spot like your heel or the ball of your foot can derail your workout, alter your gait, and even lead to bigger injuries. The real question isn’t just “to pop or not to pop.” It’s “how do I manage this so I can keep moving?”
When a blister is large, painful, and likely to burst anyway under the stress of activity, a controlled draining is your best defense. This isn’t about popping it for relief; it’s a strategic move to prevent an uncontrolled, messy tear that dramatically increases infection risk. The most critical rule in this entire process is Roof Retention. Never, ever peel off the skin covering the blister. That layer of skin is your body’s own sterile, natural dressing. It’s a powerful barrier against bacteria and the key to rapid healing. Removing it leaves a raw, open wound that’s painful and highly susceptible to infection.
How to Safely Drain a Blister
If you’ve decided a blister needs draining to continue your activity, you must act with precision. This isn’t a battlefield repair; it’s a clean procedure. While trusted health sources like the UK’s NHS provide excellent general advice on how to treat a blister, this protocol is adapted for the high demands of an athlete. First, gather your sterile toolkit: antiseptic wipes, a sterile needle or lancet, sterile gauze, antibiotic ointment, and a quality non-stick dressing or blister plaster.
- Step 1: Create a Clean Field. Wash your hands and the blistered area thoroughly with soap and water. Follow up by wiping the blister and surrounding skin with an alcohol or antiseptic wipe to eliminate surface bacteria.
- Step 2: Sterilize and Pierce. Sterilize your needle with a flame until it glows red, letting it cool completely, or wipe it thoroughly with rubbing alcohol. Gently pierce the blister near its edge in 2-3 spots. Go parallel to the skin, not straight down. This creates a small channel for fluid to escape.
- Step 3: Drain the Pressure. Using a piece of sterile gauze, gently press on the blister to massage the fluid out through the pinpricks. Don’t force it. The goal is to relieve pressure, not completely flatten it.
- Step 4: Protect and Defend. Apply a thin layer of antibiotic ointment over the drained blister. Cover it with a non-stick dressing, hydrocolloid blister bandage, or a donut-shaped moleskin pad to prevent further friction. This becomes your artificial second skin while the real one heals underneath.
Recognizing Signs of Infection
A properly managed blister should heal without issue. But in high-performance environments where sweat and bacteria are constant, you must be vigilant. An infection is a direct threat to your health and your training schedule. Stop all self-treatment and see a medical professional immediately if you notice any of these red flags:
- Yellow or green pus draining from the site.
- Increased pain, swelling, or intense redness around the blister.
- Red streaks radiating away from the blister (a sign of spreading infection).
- The skin around the blister feels hot to the touch.
In rare cases, a skin infection can involve more serious bacteria, such as MRSA. If you have concerns about this, especially after exposure in communal settings like gyms, you can learn more about at-home screening options at mrsatest.co.uk.
Ignoring these signs can lead to cellulitis, a serious bacterial skin infection that could sideline you for weeks. Effective foot blister treatment is about smart, immediate care. While this guide gives you the tools to handle a crisis, remember that the ultimate victory is prevention. Proactive care with the right protective balm is the secret weapon that keeps you on your feet and conquering your goals, blister-free.
Advanced Dressing Techniques: Choosing the Right Protection
Your standard adhesive bandage won’t cut it. When you’re an athlete, a blister isn’t just a minor annoyance; it’s a direct threat to your performance. Treating it requires more than a simple cover-up. You need tactical protection. The right dressing acts as a piece of high-performance gear, creating an optimal environment for rapid healing while you stay active. This isn’t just about comfort; it’s a crucial part of any serious foot blister treatment strategy that keeps you moving toward your goals.
Hydrocolloids: The “Second Skin” Approach
Think of a hydrocolloid bandage as a high-tech healing chamber for your skin. Unlike traditional plasters that create a dry environment, hydrocolloids contain gel-forming particles that absorb fluid from the wound. This process creates a moist, insulated, and cushioned barrier that medical professionals recognize as the gold standard for wound care. Studies show this method can accelerate skin cell regeneration by up to 40% compared to dry healing. It’s your body’s healing process, supercharged.
For a burst or deroofed blister, this technology is a game-changer. A dry gauze or cotton pad can stick to the raw, exposed dermis, causing excruciating pain and tearing away new skin cells upon removal. A hydrocolloid dressing forms a soft gel directly over the wound, preventing this trauma. It protects the delicate nerve endings and provides a shield against bacteria. For detailed guidance on managing a torn blister, the Mayo Clinic’s guide to blister first aid offers excellent, medically-reviewed protocols.
Pro-Tip: To make a hydrocolloid bandage stick through sweat, preparation is everything. Apply it to clean, completely dry skin at least one hour before your workout. Before peeling off the backing, warm the bandage between your palms for 30-60 seconds to make the adhesive more pliable and effective. For maximum adhesion during an ultramarathon or multi-day event, consider using a medical-grade adhesive enhancer wipe around the edges.
Moleskin and Foam Padding
Moleskin is your frontline defense against pressure and friction. It doesn’t heal the blister directly; its job is to run interference. This thick, durable cotton flannel acts like a sacrificial layer, absorbing the shear forces from your shoe and sock that would otherwise irritate the blister. By redirecting this energy, you allow the skin underneath to heal without constant disruption. It’s the invisible armor your feet need to endure the miles.
The “donut padding” technique is an essential skill for any athlete. For a painful, raised blister, this method provides immediate relief by offloading all direct pressure. Here’s how it works:
- Cut a piece of moleskin or athletic foam padding slightly larger than the blister.
- Fold it in half and cut a small semi-circle out of the middle.
- When you unfold it, you’ll have a perfect “donut” or “horseshoe” shape.
- Place the padding on your skin so the blister sits untouched inside the hole. The surrounding material will now take the impact.
Choose this advanced padding technique over a simple bandage when the blister is in a high-pressure zone like the ball of your foot or the back of your heel. If the blister is intact and causing pain with every step, a donut is non-negotiable. It provides structural protection that a flat dressing simply cannot. Having the right tools is half the battle. Browse our shop for professional-grade protection and build an unbeatable blister-fighting kit.
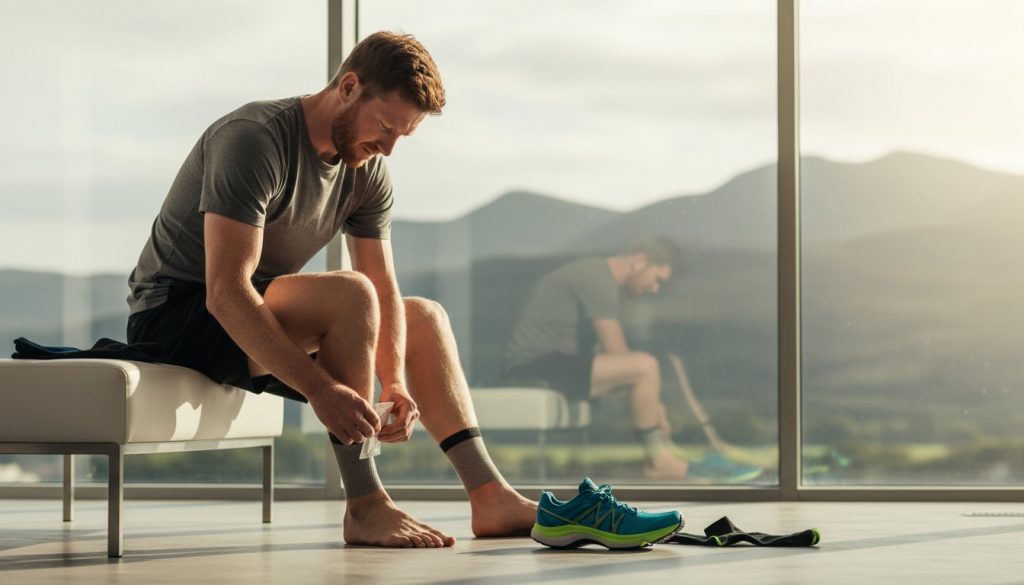
The Active Recovery Protocol: How to Train While Healing
A blister doesn’t have to mean a full stop. For a dedicated athlete, sitting on the sidelines is the hardest part of any injury. The good news is you don’t have to. Effective foot blister treatment isn’t just about what you do while resting; it’s about how you adapt when you’re moving. This protocol is your blueprint for staying active, protecting the injured area, and preventing new hot spots from forming. Take control of your recovery.
Footwear Adjustments for Recovery
Your shoes can be your greatest ally or your worst enemy during recovery. To relieve direct pressure on a blister, try “window lacing” by skipping the eyelets directly over the painful spot. If a blister forms on your toe or the ball of your foot, consider temporarily switching to a shoe with a wider toe-box, giving the area at least 4mm of extra space to reduce compression. Your sock choice is also critical. Cotton is a performance killer; it can absorb up to 27 times its weight in moisture, creating a swampy, friction-filled environment. Always choose moisture-wicking synthetic socks made from materials like polyester or nylon to pull sweat away from your skin.
Managing Hot Spots on the Go
While one blister heals, your altered gait can create new pressure points. The key is proactive protection. Applying an anti-friction balm to vulnerable areas like your arches, heels, and toes creates a layer of “Invisible Armor” that moves with you. Unlike athletic tape, which can wrinkle, bunch up, and lose adhesion with sweat, a quality balm provides durable, seamless protection. It’s the ultimate defense against secondary blisters. Get your secret weapon for chafe-free training and keep new irritation from ever starting.
To further reduce friction, master the “Sock Double-Up” method. Wear a thin, synthetic liner sock underneath your regular athletic sock. This simple trick transfers the friction from your skin to the two fabric layers, allowing them to slide against each other instead of your foot. It’s a low-tech solution with a high-impact result on comfort and protection.
Stop your foot from sliding inside your shoe, a primary cause of heel and toe blisters, by using the “Heel Lock” or “Runner’s Knot” lacing technique. By utilizing the extra, unused eyelets at the top of your running shoes, you can create a secure loop that cinches the collar of the shoe around your ankle. This simple adjustment anchors your heel in place, drastically reducing internal movement without overtightening the rest of your shoe.
Finally, prioritize keeping your feet dry. Moist skin has over 50% less structural integrity than dry skin, making it incredibly susceptible to tearing from friction. A comprehensive foot blister treatment plan must include moisture management. You can achieve this by:
- Using an absorbent foot powder before putting on your socks.
- Carrying a spare pair of moisture-wicking socks to change into during long training sessions.
- Choosing footwear with breathable mesh uppers to promote airflow.
Don’t let a blister dictate your training schedule. Equip yourself with the right strategies for active recovery and explore our performance-driven anti-chafe solutions to stay in the game.
Prevention as the Ultimate Treatment: Your Invisible Armor
You’ve learned how to drain, dress, and heal a blister. Now it’s time to make that knowledge obsolete. The most effective foot blister treatment is the one you never need: prevention. It’s about shifting your mindset from reactive repair to proactive protection. Let’s set a new standard together. Your goal for 2026: Zero blisters. Zero missed training days. Zero limits.
For decades, athletes relied on a clumsy arsenal of tapes, moleskin, and sticky bandages. These methods are flawed. They bunch up, trap sweat, and lose adhesion after just a few miles, often causing more irritation than they prevent. It’s time to upgrade your gear. The solution isn’t adding more layers; it’s applying a smarter, invisible one.
The science is simple. Blisters form from friction and shear force. Heat and moisture accelerate this process. To stop a blister, you must reduce the coefficient of friction between your skin, your sock, and your shoe. A 2021 study in the Journal of Applied Biomechanics found that topical lubricants can reduce this skin-surface friction by over 22%, effectively stopping blisters before they can even begin to form. This is where your new secret weapon comes in.
The Power of RG Anti Chafe Balm
Forget messy, unreliable tapes. RG Anti Chafe Balm creates a durable, invisible, and breathable barrier on your skin. It glides on smoothly and stays put, protecting you for hours. Formulated with natural ingredients like Carnauba Wax and Vitamin E, it shields your skin without clogging pores, allowing it to breathe and sweat naturally. This isn’t a greasy, petroleum-based product. It’s high-performance skin armor. That’s why elite marathoners and Appalachian Trail thru-hikers consider it their most essential piece of gear.
The Long-Term Foot Care Checklist
Adopting a proactive prevention strategy is the ultimate foot blister treatment. It builds resilient feet that can conquer any challenge. Your new routine is simple but non-negotiable. It’s the foundation for every personal best you’re about to set.
- Daily Moisturizing: Every night, apply a quality foot cream. Supple, hydrated skin has greater elasticity, making it significantly more resistant to the shear forces that cause deep blisters.
- Proper Nail Trimming: Keep toenails cut short and straight across. Overly long nails can press against the front of your shoe or adjacent toes, creating pressure points that lead directly to blisters under or next to the nail.
- Routine RG Balm Application: Make it a habit. Before every run, hike, or training session lasting over 30 minutes, apply RG Anti Chafe Balm to your known hot spots: heels, arches, and between the toes. This is your chafe-free guarantee.
Stop treating blisters and start preventing them. Your feet are your foundation. Protect them with the best, and unleash your true potential. Embrace the freedom of pain-free performance and conquer your next goal with confidence.
Conquer Your Next Mile, Blister-Free
You’ve learned the essentials for active recovery and safe healing. Knowing how to properly use dressings and modify your training keeps you in the game, but the ultimate goal isn’t just recovery. It’s relentless forward motion. The most effective foot blister treatment is the one you never need.
Don’t let friction dictate your limits. It’s time to equip yourself with your secret weapon. RG Anti Chafe Balm acts as your Invisible Armor, creating a slick, friction-free barrier without the bulk of bandages. Formulated with Natural Ingredients, it’s safe for daily application on sensitive skin. It’s the performance gear trusted by thousands of marathon runners and long-distance hikers worldwide to keep them moving in comfort.
Stop blisters before they start—Shop RG Anti Chafe Balm today.
Your next personal best is waiting. Go conquer it.
Frequently Asked Questions
Should I pop a foot blister or leave it alone?
Leave the blister alone if you can. The American Academy of Dermatology Association advises that the intact skin is your body’s natural barrier, protecting the wound from infection. Popping it exposes the raw skin to bacteria and can significantly slow down your recovery. If a blister is large and painful, preventing you from walking, a medical professional can drain it safely. Trust your body’s protective instincts.
How can I heal a blister on my foot overnight?
You can’t fully heal a blister overnight, but you can give your recovery a powerful head start. True healing takes time for your skin to regenerate. To accelerate the process, gently clean the area, apply an antiseptic, and cover it with a hydrocolloid bandage. This creates a moist, protected environment that clinical studies show can reduce healing time by up to 40% compared to leaving it exposed to air.
Can I keep running with a blister?
Yes, you can often keep running with a blister if you give it the right armor. Don’t let a hotspot conquer your training schedule. Protect the area with a specialized blister bandage, like a hydrocolloid plaster, which provides a thick cushion and dramatically reduces friction. For extra defense, you can cut a “doughnut” shape out of moleskin to place around the blister before covering it.
What is the best dressing for a burst blister?
The best dressing for a burst blister is a hydrocolloid bandage. This is the secret weapon in any athlete’s foot blister treatment kit. It acts like a second skin, forming a protective gel cushion over the raw wound. This seals out dirt and bacteria while creating a moist environment that promotes faster healing. Gently clean the area, but leave the flap of skin on before applying the dressing.
How do I stop my shoes from giving me blisters?
Stop blisters by ensuring a perfect shoe fit and eliminating friction. Your running shoes should have about a half-inch of space, or a thumb’s width, between your longest toe and the shoe’s end. Always wear moisture-wicking socks made from synthetic blends, not 100% cotton. For ultimate protection, apply a specialized anti-chafe balm to hotspots before every run to create an invisible, friction-proof barrier.
Is it okay to put a blister plaster on a popped blister?
Yes, it’s an excellent idea to put a blister plaster on a popped or burst blister. After you’ve gently cleaned the area with mild soap and water, applying a hydrocolloid plaster will shield the raw skin underneath. It creates a seal against bacteria, cushions the wound from painful pressure, and maintains a moist environment that is proven to help your skin rebuild and recover much faster.
How do I know if my foot blister is infected?
You’ll know a blister is infected by looking for clear warning signs. Watch for yellow or green pus, increased pain or swelling, and redness that spreads more than 2cm from the blister’s edge. The skin around it may also feel hot to the touch. If you experience these symptoms, especially with a fever of 100.4°F (38°C) or higher, it’s crucial to see a doctor for medical care.
Does Vaseline prevent blisters as well as specialized balms?
No, Vaseline is not as effective as a specialized anti-chafe balm for athletes. While it reduces friction initially, petroleum jelly is greasy and can break down inside your sock within 2-3 miles, trapping heat and moisture. High-performance balms use plant-based waxes to create a more durable, sweat-resistant, and breathable barrier. They provide long-lasting, invisible armor that won’t degrade your technical socks or shoes.